AI Food Background Removal — Manual vs AI, and Why a Cutout Alone Isn't Enough
How accurate is AI background removal on food, and are the free tools good enough? This guide compares manual and one-click AI cutouts on speed, edge quality and the cases that break them (translucent drinks, steam and sauce, gaps in noodles and salads) — then explains why a cutout alone often makes a dish look like a sticker, and what to do after removing the background.
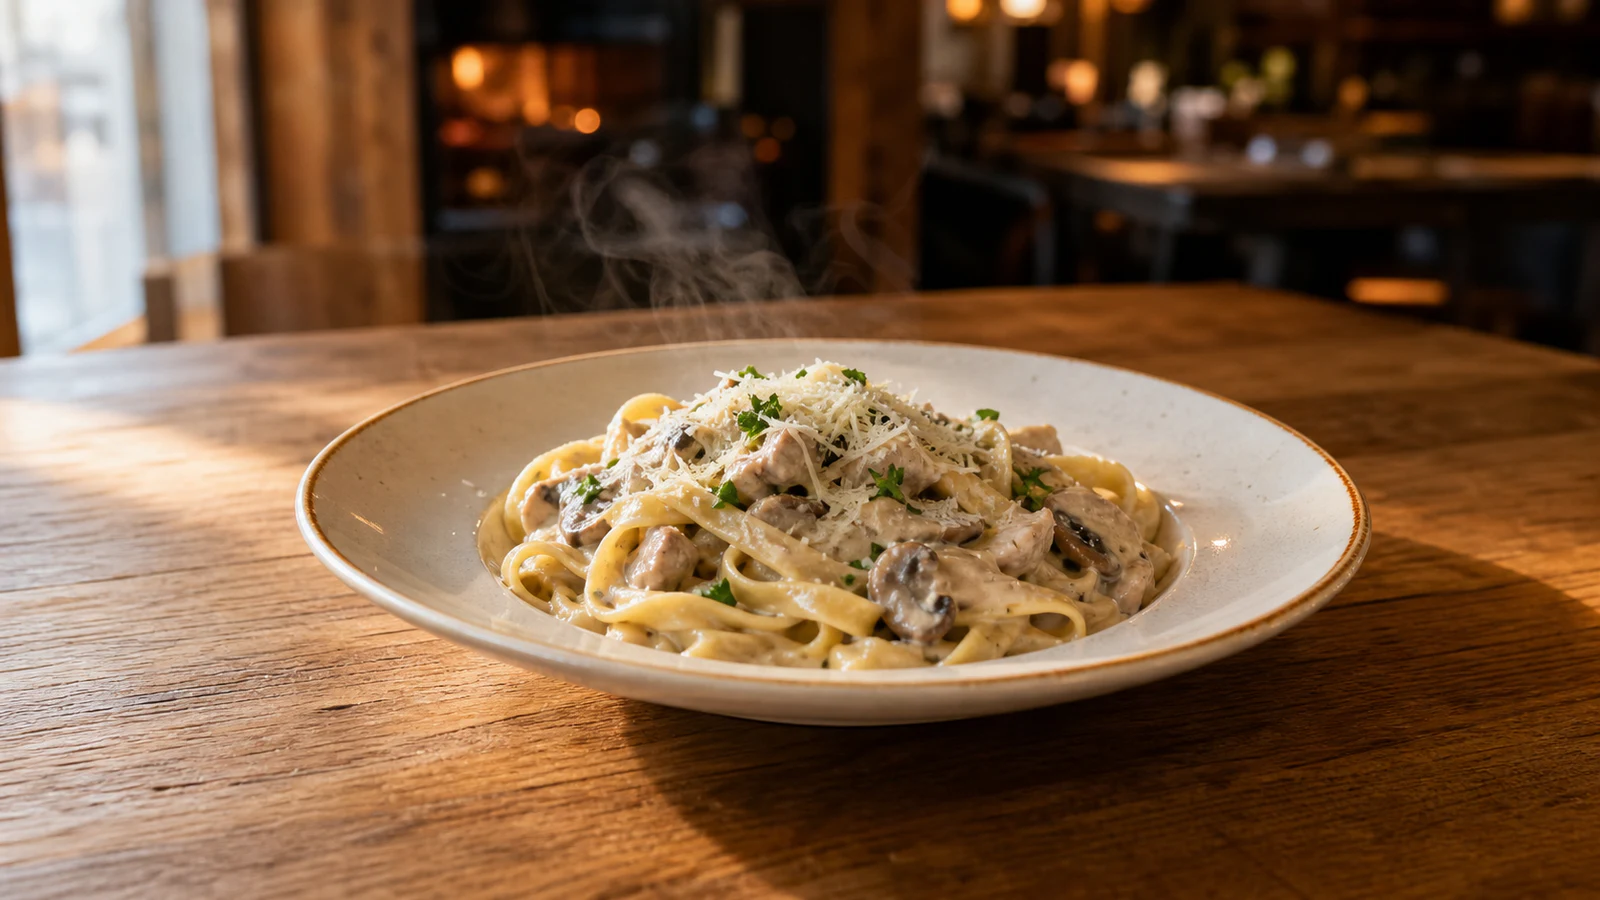
There is no shortage of tools promising to remove the background from your food photo in three seconds. Before you open one, though, ask yourself a question: do you want a transparent image, or do you want a dish that looks good and is actually usable?
Those are not the same thing. Removing the background is a means, not an end. This guide compares manual and AI cutouts, catalogues the cases where food is unusually hard to cut out, and then covers the thing almost nobody mentions but which matters most: why a cutout on its own often leaves your dish looking like a sticker.
Three ways to remove a background
Manual cutting in Photoshop
Tracing with the pen tool, or separating the subject using channels, produces the most precise result — and takes the most time. A single image often runs several minutes to a quarter of an hour, and it requires a Photoshop licence plus real skill. Quick-selection tools are faster but tend to leave jagged edges that need cleaning up anyway.
Commissioning a studio cutout
Hiring a photographer to shoot on white or against a clean backdrop gives the highest quality — and costs the most, plus studio scheduling. As the photography studio Austeben points out about its own work, a cutout photo is "a photo that still needs a designer to retouch or lay it out before it can be used." It's a half-finished component, not something you can publish as-is.
One-click AI removers
remove.bg, PhotoRoom, Canva, Adobe Express and food-specific tools like FoodShot AI all advertise automatic removal in seconds to around 90 seconds. Fastest, and most have a free tier — but with limitations that are easy to miss (covered in the comparison below).
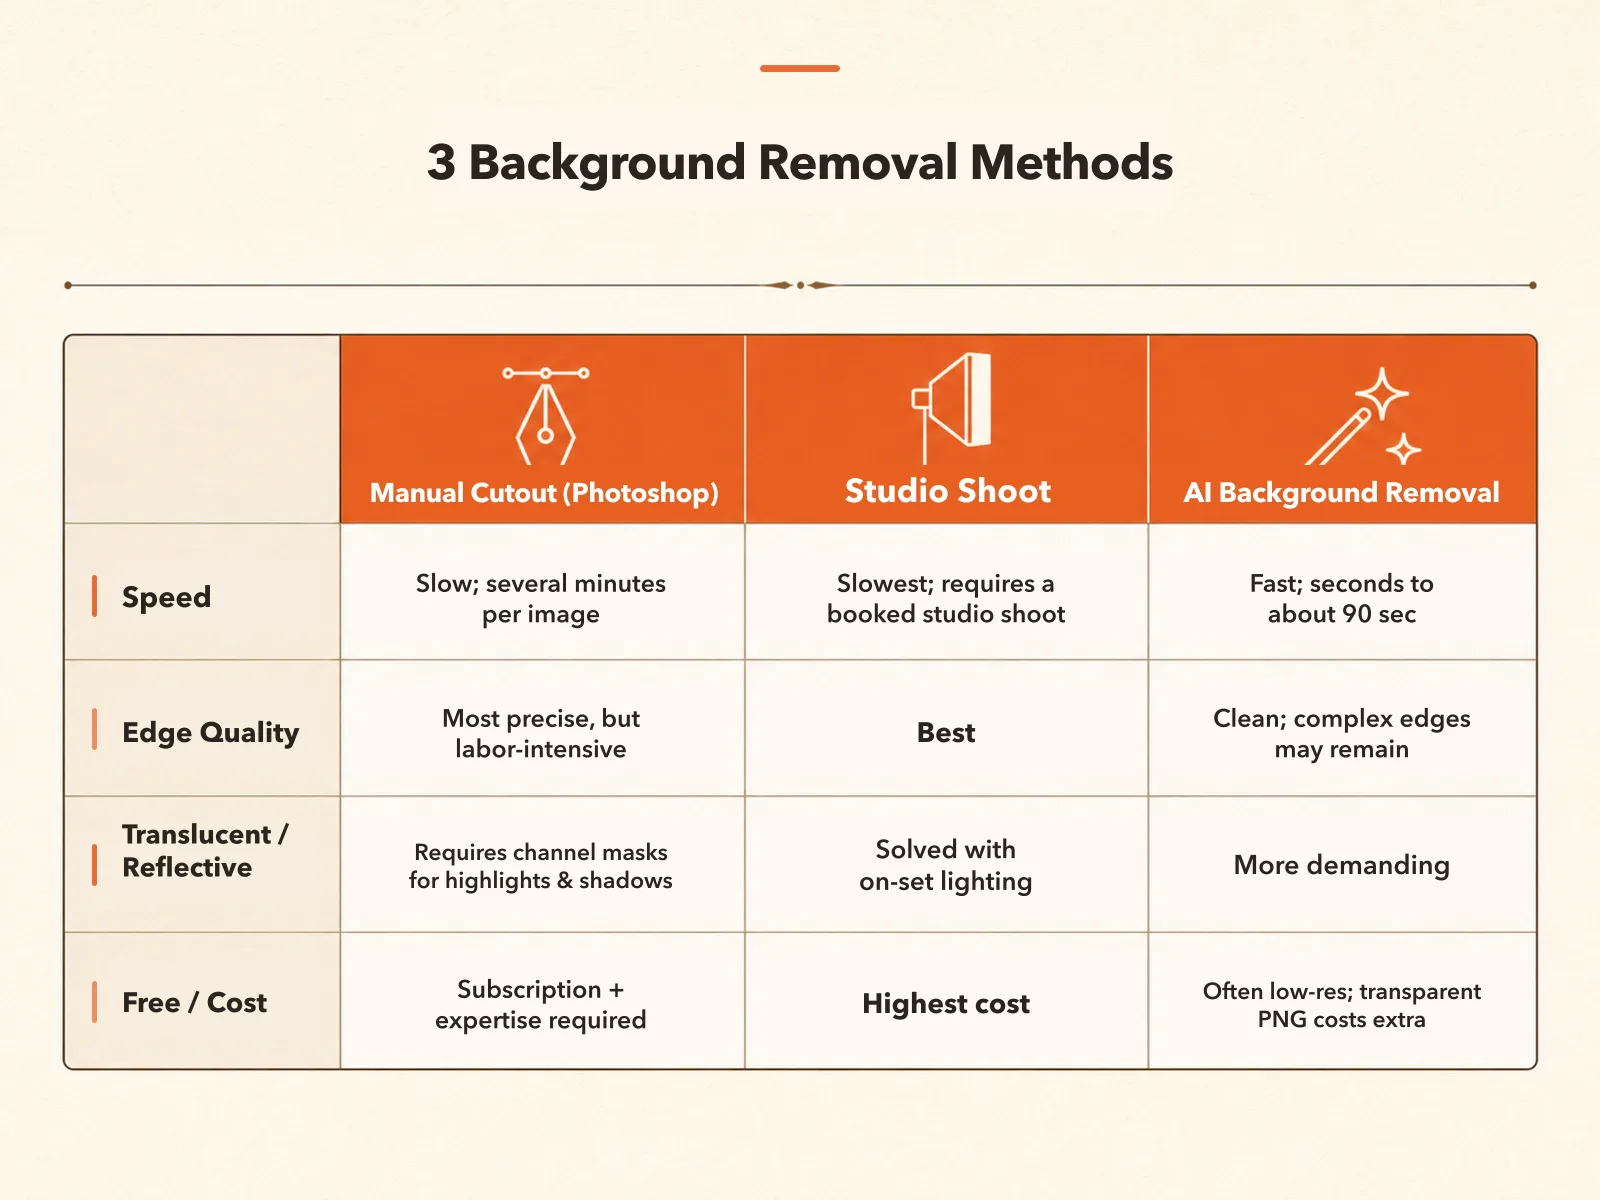 Each method trades off differently. Tool speeds are vendor claims, and free-tier terms change with pricing revisions. (AI-generated illustration)
One point that gets overlooked: many free AI removers look free but carry a hidden cost. remove.bg's free tier typically only downloads a low-resolution preview (third-party reviews put it around 0.25 megapixels), with credits required for full resolution; Canva needs Pro for reliable transparent PNG export. These terms change — check each vendor's current pricing page.
Where food is unusually hard to cut out
General tutorials talk about hair and complex edges. Food has its own problem cases:
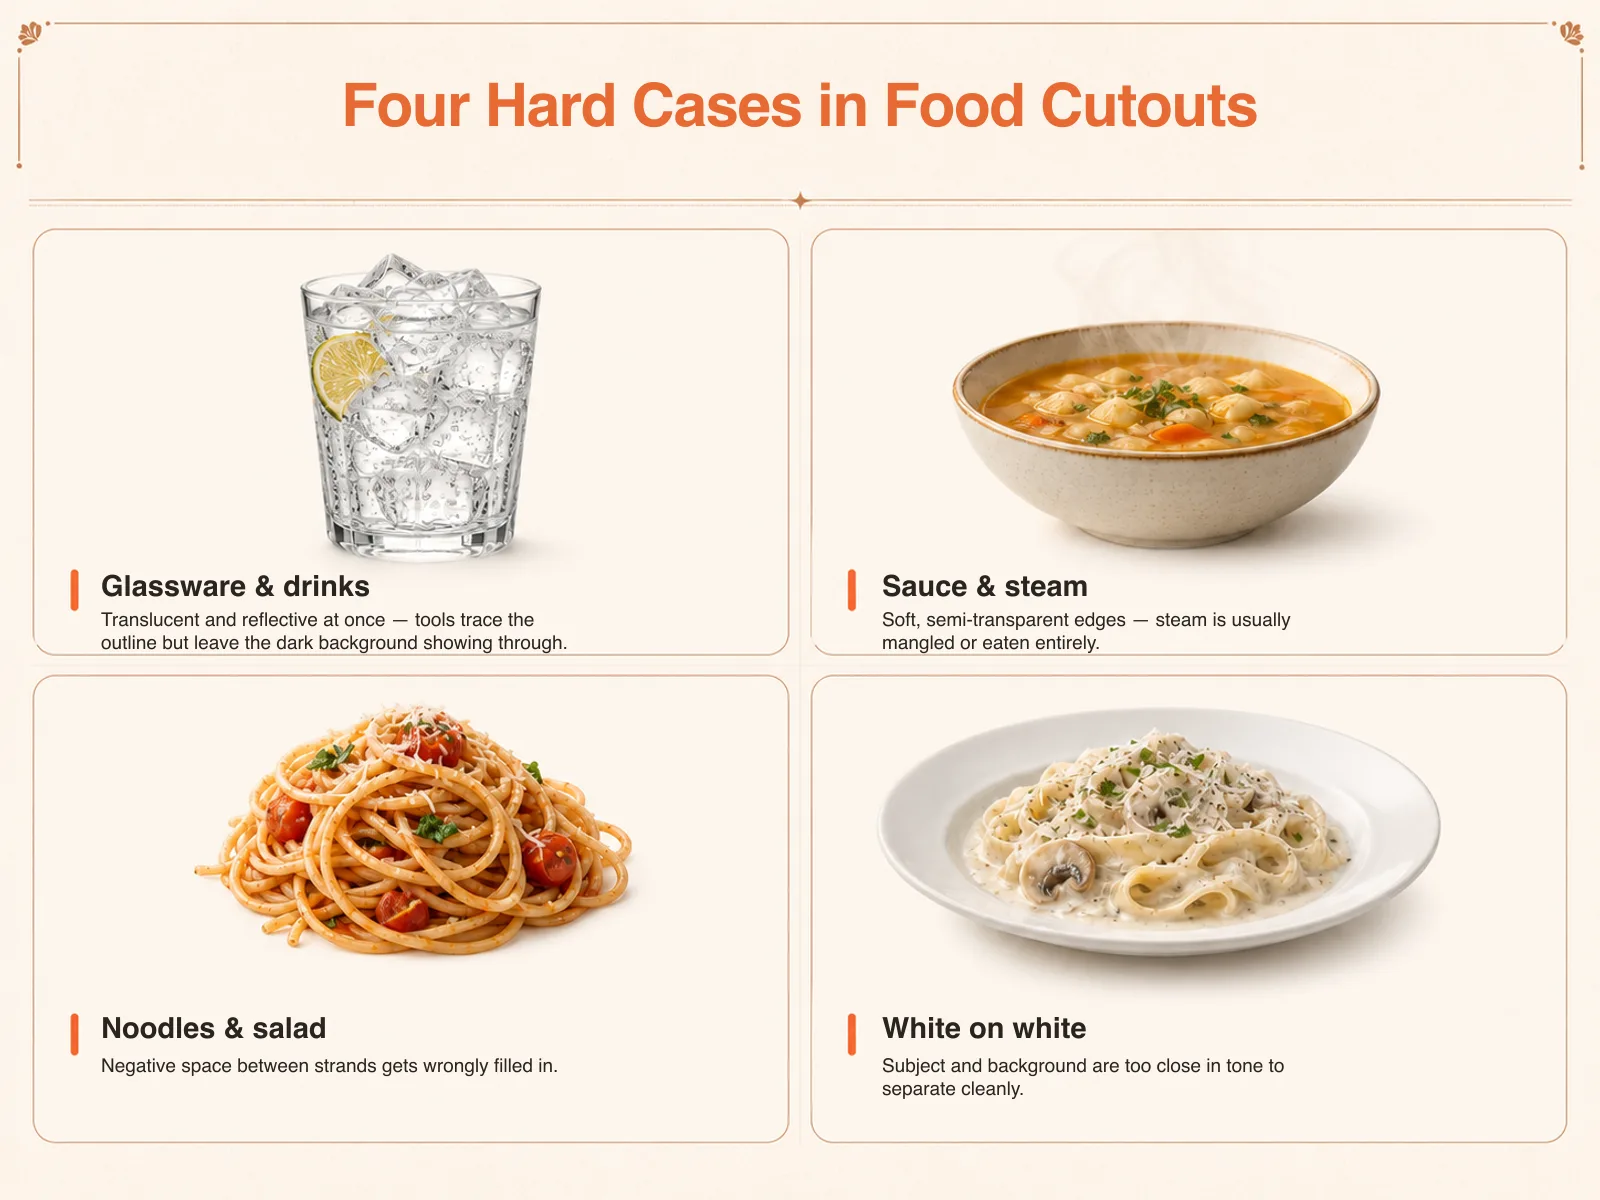 Glassware, steam and sauce, gaps in noodles, and white-on-white — these four categories break automatic removal most often. (AI-generated illustration)
- Glassware, drinks and ice. Translucent and reflective at once, widely considered among the hardest subjects. Automatic tools often trace the outline of the glass but leave the original dark background showing through it rather than making it genuinely transparent. The professional approach separates highlights and shadows using channels, and when shooting, adds rim light along the side of the glass.
- Sauces, dressings and steam. Soft-edged, semi-transparent regions that automatic removal either mangles or eats entirely.
- Gaps in noodles and salads. Those holes need to become genuinely transparent; automatic tools routinely fill them in.
- White sauce on a white plate, dark sauce on a dark plate. When subject and background are close in colour, no tool cuts cleanly — this is a shared weakness across the board.
Rule of thumb: for dry, high-contrast dishes — a plate of pasta on a dark table, say — one-click AI is usually good enough. For anything in the list above, budget for manual edge cleanup or plan on a different approach entirely.
Why a cutout alone isn't enough
This is the trap most people fall into: they get the transparent PNG, drop it onto the menu, and the dish ends up looking like a sticker floating on white. Not remotely appetising.
The reason is simple: removing the background also removes the surface, the shadow and the ambient light. What makes a plate of food read as present, hot, just-served is exactly that interplay — the reflection off the table, the shadow at the rim of the plate, the highlights on the food itself. Strip it all away and the dish goes flat, weightless and artificial.
So a cutout is a half-finished component. A photo that can genuinely carry a menu, a table tent or a feature graphic needs its light and context restored after the background comes off — which is precisely why professional cutout photography still goes to a designer afterwards.
Two more things worth flagging:
- A PNG from a free stock site is not your dish. Freepik and Pixabay give you generic imagery; used on your own menu it misrepresents what you serve — the customer sees one thing and is served another.
- Transparent PNGs are for design compositing — menu layouts, table tents, posters, promotional graphics. Note that delivery platforms such as Uber Eats and foodpanda require rectangular photographs for item images, not transparent PNGs, so don't upload a cutout as a delivery item thumbnail.
After the cutout: put the dish somewhere better
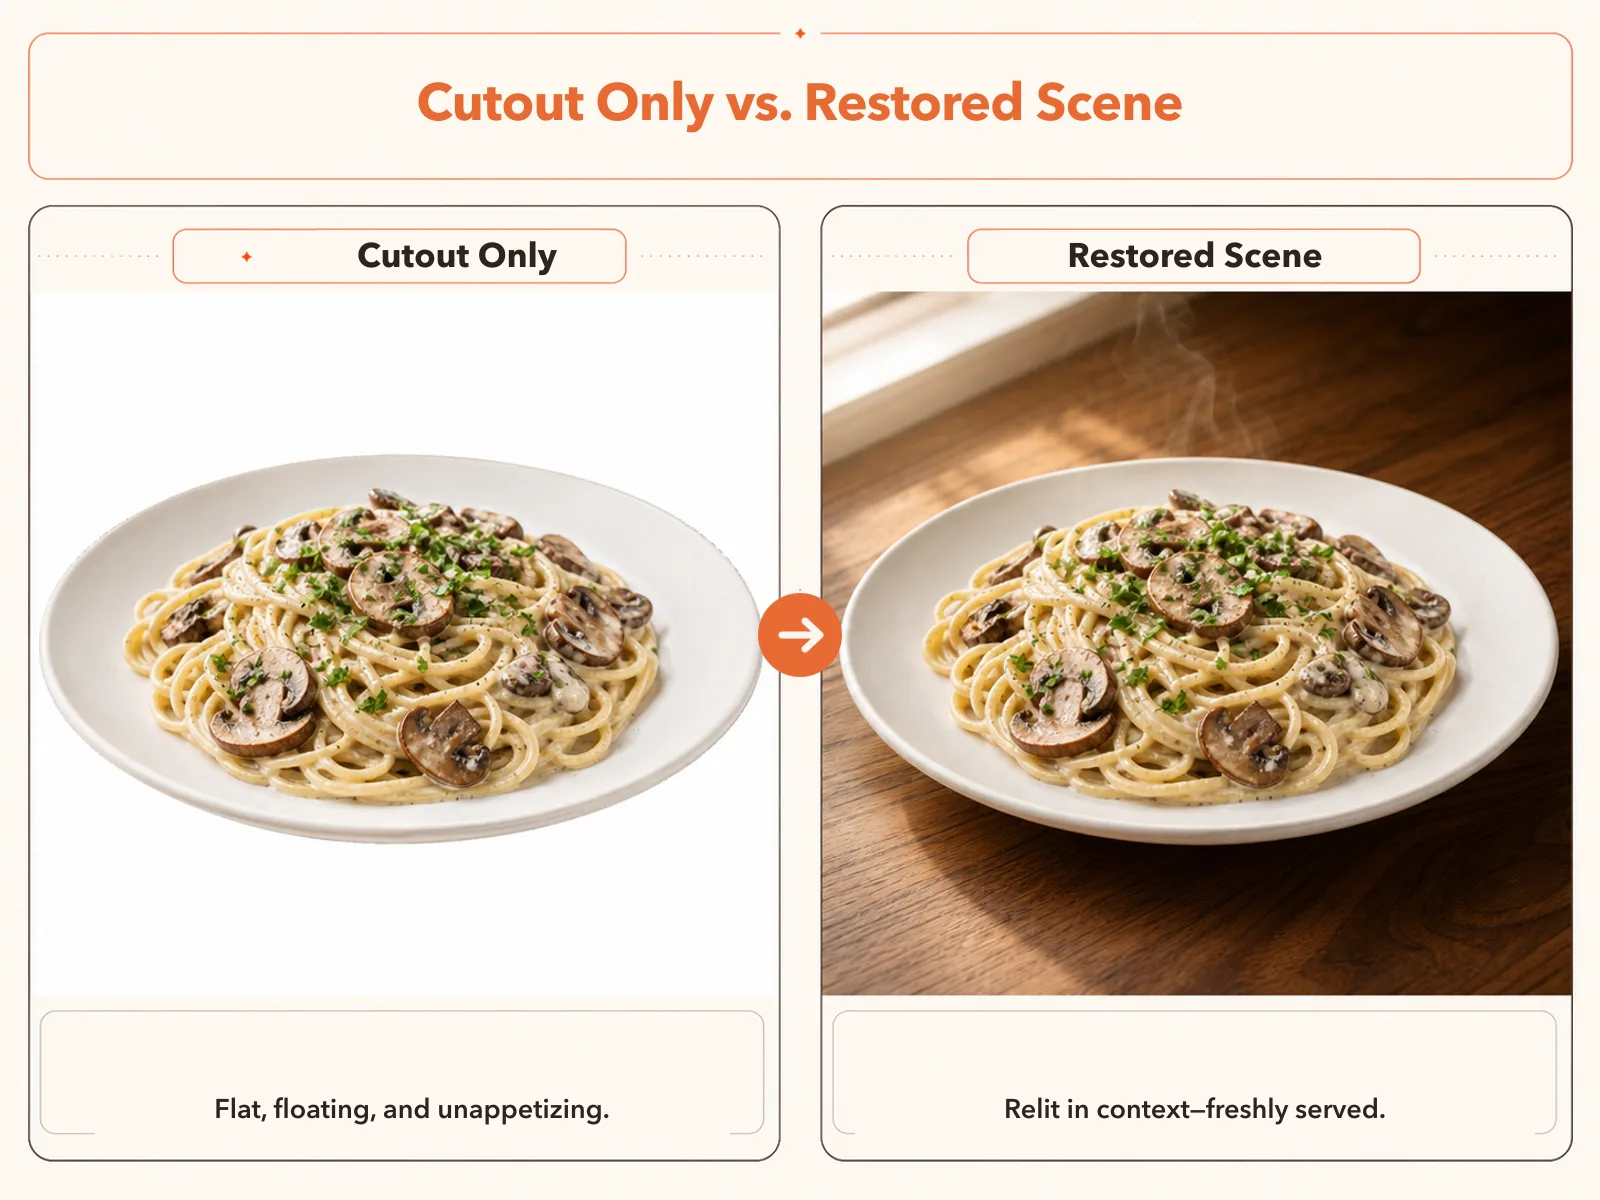 A bare cutout reads as a sticker; restore the scene and the light, and the dish looks like it was just set down on the table. (AI-generated illustration)
If the point of removing the background was to make the dish look better and be usable, the more complete move isn't to stop at a transparent PNG — it's to replace the background with a better scene and restore the light and texture, so the food looks freshly served.
That's the approach MenuFactory takes: upload a photo you shot yourself, and the AI doesn't just strip the cluttered background — it places the dish into a more appetising setting and restores shadow and ambient light. Crucially, it works on the actual plate you photographed, not a stock image. The food is your food; only the presentation improved.
FAQ
How accurate is AI food background removal? Are free tools good enough? For dry, high-contrast dishes, a few seconds is enough and the free entry tiers usually suffice. Translucent glassware, steam and sauce, and the gaps in noodles or salads are where it breaks down — and free tiers often cap resolution or charge before you can download a transparent PNG. Work out which category your dish falls into, then pick a tool.
Manual or AI — which should I choose? Extreme precision for a single image, or large-format print: manual or a studio. High volume, self-serve for a menu or social: AI. But the deciding factor isn't which cuts more cleanly — it's whether the resulting image is usable as-is.
My cutout looks fake and weightless. What now? Because the cutout took the shadow and ambient light with it. The fix is to restore or replace the scene and rebuild the lighting, rather than stopping at a transparent PNG on a white field.
Don't want to end up with a sticker-like transparent PNG? Six free credits — upload one photo of your own dish and see what a cutout plus a restored scene looks like. Still your food, just far more appetising.